Wednesday, December 22

Waffles and Pancakes! Oh, My!

Please, Please, Please, Never Buy Premade Pancake or Waffle Mix Again…

And no they really can’t be the same thing. Time after time I have seen pancake and waffle mix for sale at various places and the only conclusion that I can come as to why anyone buys them is, that people really don’t realize that the ingredients for both are probably things that they have in their own pantries, and how very simple it is to make and store them. Needless to stay I was blissfully unaware of the prepackaged notion of pancake and waffle mixes until middle school, since I had never seen one at home, now I’m in my twenties. If you grew up in a house hold with premade mixes then now is your chance to branch out and experiment with a twist on some old favorites! My favorite pancake mix came from my mom who found it in one of her cook books (long before me!) when she once took the time to inspect the ingredients on the box of mix that she had grown up with, and discovered not only the money she could save since she already had all of the ingredients, but behold the fresh and amazing taste of “from scratch” baked goods that are the essence of homemade pancakes and waffles………and NO, I reiterate they can not be from the same batter.

Compare the following:

My Favorite Pancakes,

1 ¼ cup sifted all-purpose flour

3 tsp baking powder

1 Tbsp sugar

½ tsp salt

1 egg (beaten)

1 cup milk

2 Tbsp vegetable oil

Sift together the dry ingredients (flour, baking powder, sugar, and salt) in a mixing bowl. In another bowl combine the wet ingredients (egg, milk, and oil); then add them to the dry ingredients, stirring until the batter is combined (the batter will be lumpy). Bake on a hot griddle or in a hot fry pan. Recipe makes about 8 4-inch pancakes. Try with blueberries and other fresh fruits!

My Favorite Waffles,

1 ¾ cups sifted all-purpose flour

3 tsp baking powder

½ tsp salt

2 beaten egg yolks

1 ¼ cups milk

½ cup vegetable oil

2 stiff-beaten egg whites

Sift together the dry ingredients. Combine the wet ingredients (egg, yolks, and milk) and stir into the dry ingredients. Stir in the oil. Fold in the egg whites, being careful not to over mix, by leaving a few fluffs. Throw desired amount into a preheated waffle maker. Makes approximately 8 waffles.

No cheating you precooked frozen waffle buyers!!!! These waffles once cooled can be placed in a freezer approved bag thrown in the icebox. Once you are ready to serve pop in the toaster and enjoy something more amazing than a preprocessed block.

That’s all there is to it!

Some tips to make your pancakes and waffles a decadent experience:

  1. Splurge on real maple syrup (a little goes a long way), and you will never go back to corn syrup imitation and not to mention now it is widely available, most grocery stores carry it.
  2. Add some fresh fruit. Depending on the season when strawberries, blackberries, raspberries, blueberries, and bananas are in season throw them in the batter or on top of your baked goods with syrup or powdered sugar.
  3. Need a break from maple syrup, add a really good homemade or farmer’s market preserve, you will be glad you tried it!
F. Beastie

We lose what we throw away...

http://www.deceptivemedia.co.uk/wp-content/photoQimages/original/deview/051117_195146_1.jpg

Ever wonder why mom’s and grandma’s cooking can never be matched and why no matter how many times you try it never ends up tasting the same? Despite the years of experience and loads of love that it feels only they could possess, there are some other little tricks of the trade. Well…in our “use it before you lose it” mentality we take with us to the grocery store we often forget how “they” did it when we try to tackle their home-grown recipes. So lesson of the day: do not throw away over ripe produce. First off, how many of us really pay attention to the ripeness of our produce? Not all of us own the land or the faculty to grow all of our own. My current bounty is limited to a window box of herbs until the next growing season allows a more fruitful garden. So given our resources we must look at our best options. It is a hard lesson learned to those virgins to canning and even to simple things like banana bread. If you use perfect, unbruised fruits or vegetables your canned tomatoes and banana bread are going to taste as green as a dandelion. It is often what we find in what we throw away, that tasty treasures can be found in an evasive adversary. Simple matter of fact, if you want the most fragrant and delicious banana bread, use bananas that have gone too soft to eat raw, often their peels have started turning black. The best canned strawberry jam I ever had I watched my mom peel off the bad spots from an overripe bin to reveal the brightest, most explosive taste of strawberry, only achievable in the midst of May, standing in a strawberry field. Unless we benefit from learning side by side with our mentors, and take the time to trim our over-ripened fruit and veg, we will always lose out on the complex taste that our loved ones had to offer from their kitchens. If they could take the time to germinate the love they had for us, and give it to us in food, so can we. Food for thought. Cheers.

F. Beastie

Sunday, December 5

Holiday Gift Guide, Eco-Indie Style

The holidays are both a wonderful and nerve-wracking time. Good food, family, games, movies, etc. But with this comes the pressure to get someone an incredible, thoughtful gift. And of course, most people like things that you can't necessarily get everywhere else. Which just adds to the pressure. Never fear! Here is a list of a few of my favorite things this holiday season, that keep in mind supporting local business, staying local, and being environmentally conscious! And food. Let's not forget food.

1. Kitchen conversions print from sweetfineday (Etsy, $30)


2. Keep Calm and Carry On (on recycled paper) from byorderofthecrown (Etsy, $19.98)

3. Local honey or jam from a farmer's market shop

4. Easy Green Living: The Ultimate Guide to Simple, Eco-Friendly Choices for you and your home by Renee Loux (amazon, $10)

5. The Art of Simple Food: Notes, Lessons, and Recipes from a Delicious Revolution by Alice Waters (amazon, $23.10)


I have this book, and I love it. Granted, I haven't gotten a chance to try any of the recipes yet, but I'm very excited to give them a go. Waters has a fantastic writing style that really lends itself to her cause (not suprisingly). Plus, it's just preeeetty.

 6. African violets, available at most garden stores/grocery stores


*I love giving plants . . . it helps the environment, gives people something to look after, and adds some natural beauty to the house. African violet care is relatively easy: indirect light, water them enough to have some water escape into the dish below the pot whenever the dirt feels really dry.


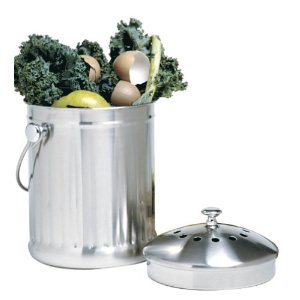
 7.Norpro 1 Gallon Stainless Steel Compost Keeper, available on amazon, $41.28


8. Organic/Fair trade clothes (if you're brave enough to go the clothing gift route) from places like Alternative Apparel, and other great etsy shops.

9. Knit a pair of gloves, a scarf, or a hat with organic yarn. I love knitting. It's so much fun, and not terribly difficult. This is homemade, well thought out . . . and the tutorials on youtube these days are great and make knitting so much less frightening than it can seem. I've posted one of my favorites at the bottom!


10. Music Mix. A great way to spread what you like, start conversations, show you care . . . and if you wanna be super green you can buy them a flashdrive (or "borrow" the flashdrive they already have) and upload the files that way to get rid of the CD that people inevitably throw away!


source: the knit witch

Friday, November 26

American as Apple Pie (but great for everyone, everywhere)

Apple pie. Apple. Pie. Apple pie!!
ok, moving on.

Classic Double-crust Apple Pie
altered from bon appetit

Crust
(I've gotta say, this crust just DID not work. I used Ina Garten's Perfect Pie Recipe. Works like a charm)
The substandard pie crust . . . let's not talk about it anymore.


Filling

1 3/4 pounds sweet apples, such as Spartan or Golden Delicious, peeled, cored, thinly sliced
1 3/4 pounds tart apples, such as Granny Smith or Pippin, peeled, cored, thinly sliced
3/4 cup plus 1 tablespoon sugar
1 teaspoon fresh lemon juice
1/2 teaspoon plus large pinch ground cinnamon
1/2 teaspoon vanilla extract

1 tablespoon milk


Crust
1. After mixing together dough, separate into two balls, flatten into 4-inch disks, wrap in plastic wrap, and refrigerate for 1 hour.


 Filling


1. Preheat oven to 400 degrees Fahrenheit. Stir together all apples, 3/4 cup sugar, lemon juice, 1/2 teaspoon cinnamon, and vanilla in large bowl to blend, let stand until juices form, about 15 minutes.


2. Roll out 1 dough disk on lightly floured surface to 12-inch round. Drape into pie dish. Spoon in filling. Don't pour it, because too much of the juice will go in, and you'll have a big ol' mess while it's baking. Roll out second dough disk, and drape over filled pie pan. Seal top and bottom crust edges together, trim to 1/2-inch overhand. Fold overhang over, crimp decoratively (if using pie-crust cutouts, place them on pie crust now). Cut four slices in top crust, to allow steam to escape. Brush pie with milk. Combine remaining 1 tablespoon sugar and large pinch of cinnamon in small bowl; sprinkle over pie.


Leftover juice


Transfer pie to baking sheet; place in oven. Immediately reduce temperature to 375 degrees. Bake pie until crust is golden brown, apples are tender and filling is bubbling thickly, covering edge with foil if browning too quickly, about 90 minutes. Cool 30 minutes. Serve warm or at room temperature. Can be made one day ahead, over loosely and store at room temperature.


Thanksgiving: Aka, a Legitimate Excuse to Eat Pie

I love Thanksgiving. Not because of the turkey, the stuffing, or anything like that, though. I love the family togetherness, and I love the pie. Pie is amazing and delicious. As someone who bakes, there are few greater pleasures than seeing a great pie come together. Maybe getting a homemade puff pastry to actually puff. I've yet to master that one.

My family (in particular my grandpa) loves pie, and since taking over the pie-making duties I have switched up recipes just about every year in an attempt to find the perfect perfect pumpkin pie and apple pie. Well, dear readers, the hunt is over. I have found the most amazing pie recipes that generate the most beautiful and delicious pies ever attempted. 

Now. Pumpkin first, shall we?

The Best Pumpkin Pie Recipe
from Cook's Illustrated via The Delicious Life (serves 8  . . . which honestly is a bit stingy. Probably more like 14)

Flaky Pie Pastry Shell Ingredients

1 1/4 cups all-purpose flour
1/2 teaspoon salt
1/2 teaspoon sugar
10 tablespoons unsalted butter, chilled and cut into cubes
3-3 1/2 tablespoons ice water*

Spicy Pumpkin Pie Filling Ingredients

2 cups (16 ounces) plain pumpkin puree, canned or fresh
1 cup packed dark brown sugar
2 teaspoons ground ginger
2 teaspoons ground cinnamon
1 teaspoon fresh grated nutmeg
1/4 teaspoon ground cloves
1/2 teaspoon salt
2/3 cup heavy cream
2/3 cup milk
4 large eggs


Directions:


Pie Pastry Shell:


1. Mix flour, salt, and sugar in a food processor (if you don't have a food processor . . . get one, please. just get one. It will change your life, I promise) fitted with a steel blade. Scatter butter over dry ingredients; process until mixture resembles cornmeal, 7 to 12 seconds. Drizzle 3 tablespoons of water over flour mixture, and process until combined (the recipe says to do this in a bowl, blah blah . . . so much easier in the processor). Form dough into a ball with your hands, flatten into a 4-inch disk, wrap in plastic wrap and refrigerate for at least 30 minutes. Can be refrigerated longer, just let it thaw a little before rolling.

2. Generously sprinkle a 2-foot square work area with flour. Remove dough from wrapping and place disk in center; dust top with flour. Roll dough in all directions, from center to edges, rotating a quarter turn and strewing flour underneath as necessary after each stroke. Flip disk over when it is 9 inches in diameter and continue to roll (but don't rotate) in all directions, until it is 13 to 14 inches in diameter and just under 1/8-inch thick.

3. (going off recipe, because I prefer my way) Carefully drape your pie crust into your 9-inch pie pan. Gently work your crust up against the sides and bottom of the pie pan (there should be no gaps, pockets, or wrinkles). Trim off the excess dough to a relatively even 3/4 inch all the way around. Tuck overhanging dough back over itself so the folded edge is flush with the edge of the pan lip. Pres double layer of dough with your fingers to seal it, then crimp the edges in whatever manner works for you!


4. (back to your regularly scheduled recipe) Refrigerate for 20 minutes to firm dough shell. Using a table fork, prick bottom and sides at 1/2 inch intervals. Flatten aluminum foil to cover the shell, including the edges. Prick the foil with a fork as well. Pour in a layer of uncooked dry beans to weight down the pie shell and prevent bubbling)


5. Adjust an oven rack to the lowest position, and heat oven to 400 degrees Fahrenheit (start preparing the filling when you put shell in the oven). Bake 15 minutes. Remove foil and bake shell for 8 to 10 minutes, or until interior just begins to color. (important note: watch this sucker! I had to whip it out of the oven quite a few times to prevent air pockets. Just press down on the pie shell with oven-mitt covered hands)


Spicy Pumpkin Pie Filling:

6. For filling, process first 7 ingredients in a food processor fitted with a steel blade for 1 minute. Transfer pumpkin mixture to a 3-quart heavy bottomed saucepan; bring it to a sputtering simmer over medium-high heat. Cook pumpkin, stirring constantly, until thick and shiny (it won't look liquidy. There's no liquid. Don't be concerned), about 5 minutes. As soon as pie shell comes out of the oven, whisk heavy cream and milk into pumpkin and bring to a bare simmer. Process eggs in food processor until whites and yolks are mixed, about 5 seconds. With motor running, slowly pour hot pumpkin mixture through feed tube. Stop process, scrape remaining pumpkin drippings into the processor, process 30 seconds longer.


7. Immediately pour warm filling into hot pie shell (Ladle any excess filling into pie after it has baked for 5 minutes or so--by this time filling with have settled). Bake until filling is puffed, dry-looking, and lightly cracked around edges, and center wiggles like gelatin when pie is gently shaken, about 25 minutes (for me, it was about 30-35 minutes, but again, my oven runs cold) Cool on a wire rack for at least one hour. Refrigerate after this if serving next day.

This pie . . . . the spices alleviate the slightly bland pumpkin flavor, creating not a heat but a warmth that is just spectacular. It is so silky smooth, delicious, and frankly beautiful. I was such a proud mama.  I got those lovely pie crust cookie-cutter thingies that just make it look so cute and festive. I baked the cut-out pieces with the crust on a separate pan (watch them, they could burn!) and just placed them on the pie after it finished baking.


*a note on pie-crusts:  I fully promote doing it all in the food processor. In my opinion, for a standard pie crust, it is not worth breaking out a pastry cutter, or worse, a fork, and driving yourself insane while you try to break up practically frozen butter into pea-sized pellets in your flour mixture. ALSO. Add more water than the recipe says. Obviously you don't want to add so much water that your pie-crust is soupy or not dough like, and you don't want it to be sticking like crazy to your fingers. But let it be slightly tacky, like almost dried paint. If it's crumpling and falling apart in pieces it will not roll out easily. Will not. You can add more flour later if you need to. You can't add more water. It's a personal process that you'll figure out as you go, but that's my experience. Also, for the love of God, when you roll something out, use a french rolling pin. Like the food processor . . . changed my life. Seriously. 

Next post: Apple Pie!!

Tuesday, October 26

The re-use part of the 3 Rs

It's frustrating, when you look at clothing catalogs and say "ooh! that's so cute . . . . and a bazillion dollars" (I'm looking at you, J.Crew and anthropologie!) I love their clothes. Love them. I do. But I'm fresh out of college, don't have two dimes to rub together, and (sometimes) I feel bad asking my parents to buy clothes for me. Particularly if these clothes aren't for any future job I may obtain, but just some fun t-shirt. 

Which leads to either selling my organs on the black market (which probably wouldn't end well for me) or finding some other creative solution. Hence, my post on my other blog the historian about this amazing tutorial I found via say YES! to hoboken, that creates graphic t-shirts using freezer paper.

The great thing about crafting is that you can use things you have around the house, like freezer paper, fabric paint, and an old t-shirt that needs a bit of a boost. The thing that I like best about being "green" is that it helps you think outside the box, finding new ways to re-purpose things, from left-overs to clothing, to building materials!

Tuesday, October 19

Dream Green Kitchens

Everyone with a computer does this these days, but as a recent college grad still living at home with my parents one of my favorite things to do is dream about my future apartment. Now, I know that I will be inevitably disappointed because I'm sure my first "grown-up" apartment is going to be about the size of a closet, but a girl can dream! Here are some of my favorite kitchens (from Design*Sponge and Apartment Therapy) and some of my favorite green kitchen products!


I'm increasingly drawn to monochromatic kitchens that are clean and relatively clutter-free.  I love the open shelving, or even floating shelves that show the stacks of dishes. I also love deep farmhouse sinks, like the one in Julia Child's Paris kitchen in Julie & Julia. I also love farmhouse tables, and butcher block countertops (which are wonderfully cheap, but apparently very difficult to maintain [according to my mumsy, they stain and mark up very easily, but I don't care, they're lovely])


That being said, I make exceptions to the monochromatic rule when I see things like chalkboard walls and amazing, graphic tile work that's bold and simplistic.


And, alright, this isn't a full kitchen, but I'm in love (LOVE!) with this tea shelf. Everything is together, it's clean and functional (my favorite!)


Also, I love the storage for all these spices. I love how they look stacked up together, and how neat and organized it is. As long as you can identify all of the different spices. 


As for some green kitchen things, here are a few things I'm in love with.

-My Bodum french press
from here
French Presses are great for a variety of reasons. First, they make a damn fine cuppa joe. You can use any sort of coffee you want, as long as it's coarse ground (Starbucks will grind your beans for free when you purchase a bag of your favorite blend. Mine is the organic Yukon blend. It's bold, nutty, and just plain delicious). Beyond it being tasty and versatile, it steeps the coffee like you steep tea. You boil the water on the stove (or in an electric water boiler) so you use a lot less electricity than regular coffee makers that have a hot plate and must boil the water itself and all that jazz. One of the downsides is that the coffee cools quickly, but I'm planning to knit my press a cozy to combat that. Also, it doesn't use filters, which eliminates the need for even recycled, unbleached filters!

My French Press is metal, but Starbucks/Bodum (and other companies) now offer presses made from recycled plastic!

-CredoBags

I don't have any CredoBags, but I want them SO badly.  They feature reusable bags of all sorts: produce bags, bulk bags, everyday shopping bags, lunch bags . . . you name it. They offer 100% cotton, muslin, and 100% organic cotton fibers, and are really just incredible. They aren't horribly expensive and seem like they would last for a long time.

-Reading is Sexy coffee mug

  I love this mug. I first saw it in a picture on We Heart It, and spent forever hunting it down.  It's made from 100% biodegradable corn plastic. I've asked for it for Christmas, and I hope (oh, how I hope!) it shall be mine.


Of course there are all sorts of green kitchen products. Wooden spoons, cast iron skillets, anything from William-Sonoma (well, not anything, but it's an amazing place where dreams come true). 

What are your favorite green kitchen appliances? And what's your dream kitchen?

Sunday, October 17

Bridal Showers, Continued

For my sister's bridal shower, I also made the amazing pumpkin waffles from over at one of my favorite food blogs, Smitten Kitchen. I'll let you discover the recipe over at her site, and go on to tell you about the midnight snack I made for the bachelorette party that followed, an absolutely delicious (if I do say so myself) carrot cake! I didn't really photograph the process, or the finished product because the homemade icing needed to be refrigerated straight away, and when we went to eat it . . . well, I was drunk. Photos weren't happening. But I will say that it was a wonderful, smooth carrot cake with fantastic flavor, and I highly recommend it. The recipe makes one double layer 9-inch cake. I've linked to the original site, and put the exact recipe up here, with my own personal notes.

Carrot Cake
(from Tom Hudgens, author of The Commonsense Kitchen

for the cake:
1 ½ cups walnut halves and pieces
2 cups sifted all-purpose flour
2 teaspoons baking soda
2 teaspoons baking powder
1 teaspoon ground cinnamon
1 teaspoon salt
1 1/3 cups safflower or other vegetable oil
1 ½ cups firmly-packed brown sugar
4 eggs, at room temperature
2 teaspoons vanilla extract
½ teaspoon finely-grated orange zest
about 4 cups peeled, thickly sliced carrots

for the frosting:

1 pound cold cream cheese
finely grated zest and juice of 1 lemon
2 teaspoons vanilla extract
3 cups sifted powdered sugar

Butter two 9-inch cake pans; fit the bottoms of the pans with circles of parchment; butter the parchment, then lightly dust the pan with flour, tapping the pan to remove excess flour.
(at first I thought this meant butter both the pan and the parchment. It doesn't. Just butter the parchment, or there's waaay too much oil on the bottom)

Heat the oven to 325 degrees. Scatter the walnuts on a baking sheet, and toast lightly in the oven, about 8 minutes, or until they are fragrant; the nuts should not visibly darken. Let the nuts cool, then lightly rub off the excess outer papery skin from the nuts. Keep the oven at 325 degrees.


Sift together the flour, baking soda, baking powder, cinnamon, and salt. In a large bowl, whisk together the oil, brown sugar, eggs, vanilla, and orange zest until smooth.


Using a food processor, pulse the toasted walnuts to a fine meal (if you're like me and don't particularly like nuts, just pulverize those suckers. you won't taste them, I promise!). Add the nuts to the large bowl with the oil mixture. 

Put the peeled, sliced carrots into the bowl of the food processor, and process until the carrots are reduced to a uniform, fine mince. Measure out 3 ½ cups of ground carrots, and add to the large bowl with the wet ingredients and nuts.

Whisk the dry ingredients into the wet ingredients, without overmixing, just until the batter is uniform. 


Scrape the batter evenly into the prepared pans (weigh the filled pans to ensure even distribution), place in the center of the oven, and bake for about 30 minutes (it took us about 45 minutes, but our oven runs cold. Just be prepared that it may take longer), or until a toothpick inserted in the center of the cake comes out clean.


Let the cakes cool for 10 minutes in the pans, then turn the cakes out onto a rack. Peel off the parchment, and let the cakes cool completely before frosting. (IMPORTANT! The 10-minute waiting period is COMPLETE crap. I waited 10 minutes to the second, and it was an utter disaster when I tried to remove the first layer. Rather than one lovely layer, I had three different pieces! Definitely let your cake cool all the way before you remove it from the pans. As I said to my mother as I mixed up another layer, THIS is why I buy extra of all the ingredients! [if it was just my family, I would've iced the pieces back together and called it good, but this was for company])


To make the frosting, put the cold cream cheese into a medium bowl. Using a wooden spoon, work the lemon zest, juice, and vanilla into the cheese until uniform, then add the sifted sugar in 2 or 3 additions, stirring the frosting until smooth. (Wooden spoon, my foot! I used a hand-held mixer, and it came together super easily. You're already making your own frosting. Don't make it any more difficult than it has to be!)


To frost the cake, put a dab of frosting in the center of a large, attractive plate. Center one of the cake rounds on the plate, and apply an even layer of frosting to the top. Place the second cake round atop the first, and apply an even layer of frosting to the top. Use the remaining frosting to cover the sides of the cake. Cream cheese makes a soft frosting that doesn’t lend itself to squiggles or other decorative elements; it is beautiful on its own, just smoothly spread on the cake, with a thread of lemon zest visible here and there. Chill if you’re not serving the cake right away. Let the cake come back up to room temperature to serve.


Sunday, October 10

Rain Showers and Banana Muffins

I love all the rain we've gotten these past few weeks. I know some people don't like it to be grey and dreary, but I think it makes everything look so vibrant! Plus, it has two fantastic benefits:

1) It will make the leaves change colors more vibrantly
2) It's a good excuse to curl up with a mug of hot cocoa or tea and some backgammon!

I've also had the pleasure of hosting my sister's bridal shower recently. She's getting married in December, and while it seemed like forever away in the summer, things are snowballing quite nicely now, and I'm getting really excited!


I'm not really used to hosting things (I think the last thing I planned was my 13th birthday party), but I knew I wanted the shower to be pretty low key, but still elegant. I wanted it to have an autumnal feel, with seasonal foods that would be tasty and filling, with only some subtle decorative touches like beautiful orange roses from the grocery store. I'm planning to break up the components into a few posts, starting with the real crowd pleaser (other than the cinnamon scones, which I bought at the grocery store, and thus they don't count).


--Banana Bread with Cinnamon Crumble Topping--
(adapted from Bakesale Betty and Bon Appetit 2008, adapted into muffins by a comment on the site)*

For bread:


1 1/2 cups all-purpose flour   
1 cup sugar
1 tsp. ground cinnamon
1 tsp. baking soda
1/2 tsp. salt
1 cup mashed ripe banana (about 3 medium bananas)   
2 large eggs
1/2 cup vegetable oil
1/4 cup honey
1/4 cup water


for topping:


2 Tbsp. sugar
1 tsp. group cinnamon
2 1/2 Tbsp. packed dark brown sugar


 -Preheat the oven to 350 degrees F
-In a medium bowl, whisk together the flour, sugar, cinnamon, baking soda, and salt.


-In a large bowl, whisk together the banana, eggs, oil, honey, and water.
-Add the dry ingredients to the wet ingredients, and stir well. 


-Scoop batter into muffin tins (either greased or with muffin cups) until each well is about 2/3 full. 
       *I recently figured out that an ice cream scoop works incredibly well for this purpose. Who knew?


-In a small bowl, mix together topping ingredients. Sprinkle evenly over each muffin.
-Bake for 25 minutes 


I love this recipe for a lot of reasons. In terms of practicality, it's great. You don't need to pull out a mixer, just a spoon will do the trick, and you only dirty one measure cup and set of spoons! If you can't already tell, I'm one of those messy cooks.


Also, you can make this recipe as organic/not organic as you want and it's still pretty foolproof. Organic bananas? Go for it! Farm fresh eggs, easy!  I've just gotten into organic flour recently . . . . I'm mostly into organic fruits, vegetables, eggs, and meats, but flour IS made from grain and such a staple of our diet that I've tried to bring that into my family as well. Also, I highly recommend organic, un-dyed paper cups for the muffins. Not only eco-friendly, but a nice rustic touch, don't you think?


*I KNOW I got this from a blogsite, it's just been so long I've forgotten which one. If anyone remembers, please please tell me and I'll credit them properly.


All photos by me!
 

It's that time of year!

Thursday, September 9

Back To Basics

So recently I adventured out to the mountains of West Virginia for a little camping pioneer style. This trip was outdoor bliss. Not tents this time but log cabins. While it scares most of us suburbanites to go without electricity or running water it was very energizing to be without cell service, internet, and all of the distractions that keep us accosted in the stresses of modern day living. It was the perfect weekend. Plenty of trails to hike, a lake stocked with fish (although I didn't catch a thing), and a good old fashion porch swing perfect for relaxing and enjoying the evenings.
Log cabin at the Whitchurch-Stouffville Museum
It is a real experience to light an old fashion wood burning stove without filling the whole cabin with smoke. It took a few of us to get it figured out but it is not exaggeration to say that was the most gratifying breakfast I ever cooked. Keeping it simple and taking pleasure in small comforts. It is a release for the soul. So find your place to unwind and disconnect for a bit. Trust me you will thank yourself later.
Source: oldsweetwatercottage
F. Beastie

Monday, September 6

Recipe: Balsamic-Baked Onions and Potatoes with Roast Pork

I made this ages ago, and kept intended to post it but you know . . . real life yakkity-smakkity. Anyway, here it is. The recipe is from Jamie at Home, the pictures are taken by my mama.

ingredients*:
 
3 1/2 lbs. medium-sized waxy potatoes, peeled and quartered lengthwise
olive oil
7 ounces of butter, cubed
1 bunch fresh rosemary, leaves picked and chopped
salt and pepper
2 tablespoons finely ground fennel seeds
1 (3 1/2 lb.) boneless rolled pork loin, skin off, fat scored in a cross pattern
6 cloves of garlic, crushed
5 medium red onions, peeled and quartered
2 stalks of celery, trimmed and chopped
4 bay leaves


1) Pre-heat oven to 400 degrees, Fahrenheit. Put the potatoes in a pot of boiling, salted water and cook around 8 minutes, then drain and return to the pan. Jamie says to "chuff them up a bit" by shaking the pan. I'm not sure what that accomplishes, but I did it anyway.

Pork, rubbed, in the pan to roast deliciously.

2) Prepare the meat: scatter a handful of the chopped rosemary on your cutting board. Sprinkle some salt and pepper, and some of the ground fennel seeds on the board as well. Roll the pork across the board, pressing the rub into the meat. Get a large roasting pan your pork will fit snugly into, and put it on your oven burner. Pour in a little olive oil and put the pork loin into the pan, fat side down. When the fat is lightly browned (probably a couple of minutes) turn it over and add the smashed garlic cloves (the first garlic you hit in my ingredient list), onion, celery, and bay leaves into the pan. Place on the bottom shelf of your pre-heated oven for 1 hour, basting halfway through (I don't think I had enough fat, because there was nothing to bast it with . . . it turned out just fine!)


3) Get another roasting pan, into which you can fit the potatoes in 1 layer, and heat it on the stove. When hot, pour a glug of olive oil into it and add the butter, rosemary and garlic. Add the potatoes and toss them in all the flavors. Add the onions and all the balsamic vinegar and season with salt and pepper. Cook for 5 minutes on the burner to reduce the balsamic vinegar a little. Place the pan on the top shelf and cook for around 50 minutes, until the potatoes and onions are dark, sticky and crispy - removing the pan to toss the onions and potatoes halfway through.


After 1 hour, the meat should be cooked. Prick it with a sharp knife - if the juices run clear, it's done; if not, pop it back in the oven for another 10 to 15 minutes, keeping the potatoes warm. Remove it from the oven and let it rest on a plate for 10 minutes. Pour away most of the fat from the pan and mash up the garlic and onion. Place the pan over the burner and add the white wine. Simmer until the liquid has reduced by half, scraping all the meaty, marmitey goodness off the bottom to make a tasty little sauce, and season if necessary. Pass through a sieve into a serving pitcher. Then slice the pork and serve it with your incredible baked onions and potatoes, drizzled with the pan juices. This meal goes great with some nice greens or an arugula salad.
**overall, this was super tasty, and I really enjoyed it. My parents said that they would tone down the balsamic a bit though. I thought it was delicious!


*I pretty much halved this recipe, because my family doesn't need that much food. However, I wanted to give the correct amounts so that those people with larger families/entertaining for company know that this is a larger dish.